
So, I’m madly getting ready for an art show in my hometown of Albany, Oregon. But, while I’m working on some new pieces of art, I thought I would take photos as I went along. So you can see how easy it is to make art with cut paper. Now, I say easy, but I have been working as an artist for quite a few years. So, keep in mind practice makes perfect and I have not achieved perfect yet. Anyway, I start with a sketch. Then…

I start with some watercolor paper to build my work on. It’s sturdy and works for me. Some people like illustration board. That works great too. As you probably already know I like to paint my own paper. I just use drawing paper and acrylic paint. I squirt paint out on the paper and move it around with an old credit card or gift card. This seems to spread the paint nicely and it drys fast. Then, I ad more layers of paint or stamp designs or shapes I even stencil a bit. I like to paint a lot of different paper so I have a nice variety to work with.

So, now I have cut out some grassy shapes and glued that down. I’m not worried about the edges being a wonky. This will be covered up with the frame. You can see that I just mix paint on the paper as I go. It’s really fun.

Oh, look! I added a rabbit. On this Rabbit friend I used a bit of scrapbook paper for his tail, tummy and neck. Scrapbook paper can come in very handy. This guy was built separately using hand painted papers I also used a white pencil to draw some of his fur.

The next step was to add some foreground grass. You can see in this photo that the glue is not quite dry yet. But, it will all dry flat and lovely. I hope.

I added a few more grass images in the front to add more contrast and interest. I think it’s finished!
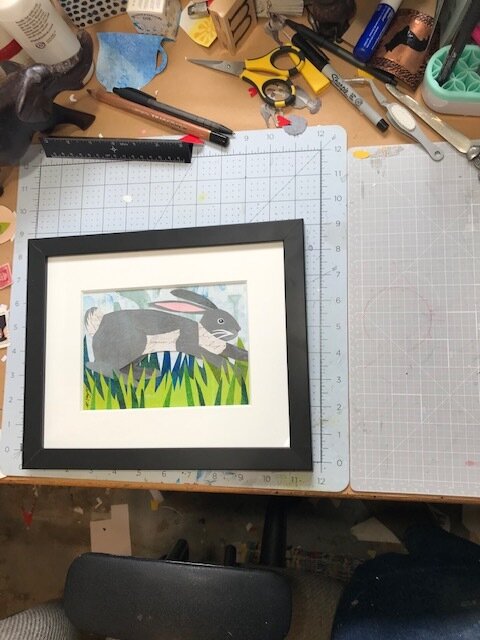
Here it is all framed and ready to go. Thanks for stopping by my blog. I hope you enjoyed the visit.